
It is time consuming and expensive for tablet manufacturers to inspect tooling equipment. That said, changes and advancement in technology makes it easier to doin-processinspections. Below is a brief on the improvement in technology to improvein-processinspection.

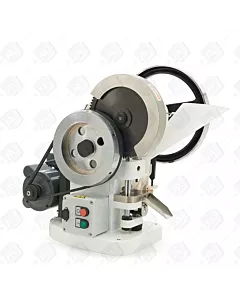
How to Change a Die
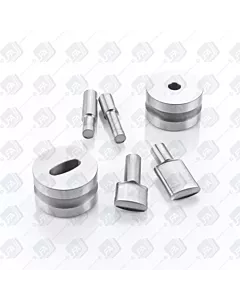
The TDP dies like most dies consist of 3 pieces that even though are separate work as one:
- Upper Punch
- Caentre Ring
- Lower Punch
To successfully change the die that's currently in the machine, you will need to remove all three parts before reassembling the press with the new tooling. You can also use this guide if you want to clean your dies. It's the same principle, but instead of inserting a new die, you clean the tooling you removed and put it back in.
What you will need
- Allen keys (different sizes)
- Monkey wrench/spanners (22mm and 24mm)
- Grease
- Pliers
ニュースレターを購読
HEALTH AND SAFETY PRECAUTIONS
- Please wear suited clothes and plug off the machine completely.
STEP 1 - Ejection tray
The first thing is to remove the ejection tray (2), to have easy access. Do this by unscrewing the two Phillips head screws (1), one on either side.
STEP 2 -Remove the base plate
2.1. Remove the boot timing bar
You need to work to separate the base plate (9) from the machine, so first unscrew the set screw (3) of the Boot Timing Bar (or arm) (5) and then the main screw (4) which holds it in place. Gently remove it being careful not to let the wheel at the top fall out. Keep the wheel together with the Boot Timing Bar
2.2. Boot
Remove the metal boot (8) located to the right of the die assembly, too. Use an Allen key to remove the boot’s central locking nut (6). It is very small so sometimes it gets missed but it’s important to be able to detach the boot. Then release the boot by loosening the securing nut (7) beneath the plate. Pliers or metal grips will make this easier.
2.3 - Lowering the lower punch die
Finally, lower the lower punch as much as you can by turning the cogs anti-clockwise that is underneath the lower die. For this, remove the bar to the right of the cogs, so you can turn them. This will allow you to take the base plate that holds the centre ring and gain access to the lower punch.
Sometimes you Will need to slightly and carefully shake the base plate and move it upwards so that it comes off easily.
STEP 3 - Take the dies out
3.1. Centre die
There is a locking bolt on the front of the base plate that you will need to loosen to be able to Remove the centre ring.
3.2. Lower punch and upper punch
There is another locking bolt (10) holding the lower punch, also located at the front of the machine at the height of the lower punch, remove this and pull out the punch die.
To remove the upper punch, there is a nut (11) that you will need to loosen. Use one 22mm spanner to loosen it and another 24mm spanner to hold the hexagon part above it in place.
STEP 4 - Insert the new dies
4.1. Centre ring
Place the die in the free hole of the base plate and Secure it by screwing the locking bolt. It’s always good to put some grease around it to ensure easy extraction next time around.
4.2. New upper and lower punches
Insert the lower punch and lock it with the Bolt you previously took off. Put the new upper punch and lock it by tightening the nut that will secure it in place.
STEP 5 - Mount the machine
Now is the time to revert what you have done previously and put back the base plate, ejection height locking bar, boot and arm. Follow the steps backwards and make sure everything is correctly locked before using the machine. When putting the base plate back, be careful with the lower punch so that it’s not damaged when you fit it inside the centre die.
And you’re done! Congratulations!
Now you can use your desktop tablet press with the new die assembly. The best is to use it first manually and adjust the settings before you turn the machine on. This will save you from damaging the machine or the tablets.
If you have any more questions, we have tutorial videos in our video section https://www.lfatabletpresses.com/videos and a customer service team who will try their best to assist you.


